top of page

#2466 BEGINNER SERIES: Lesson 9 - Stability

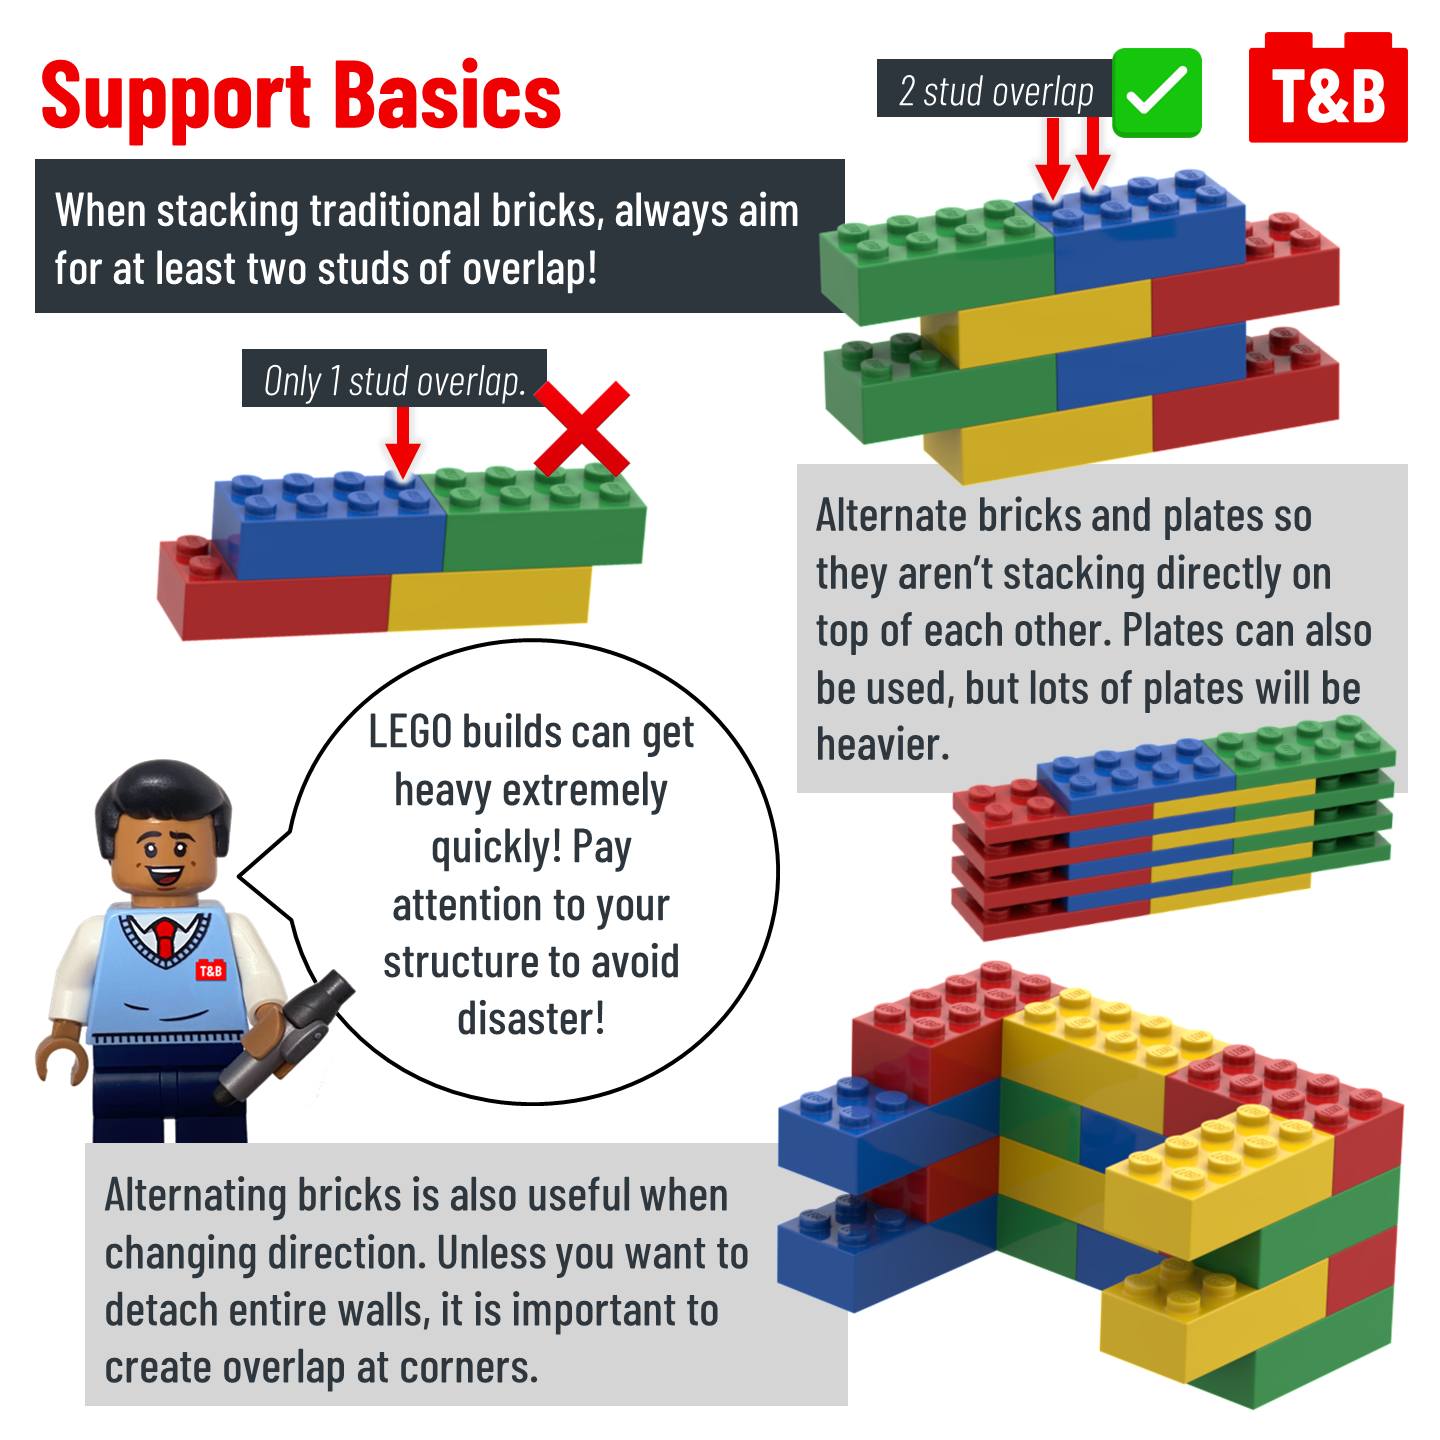
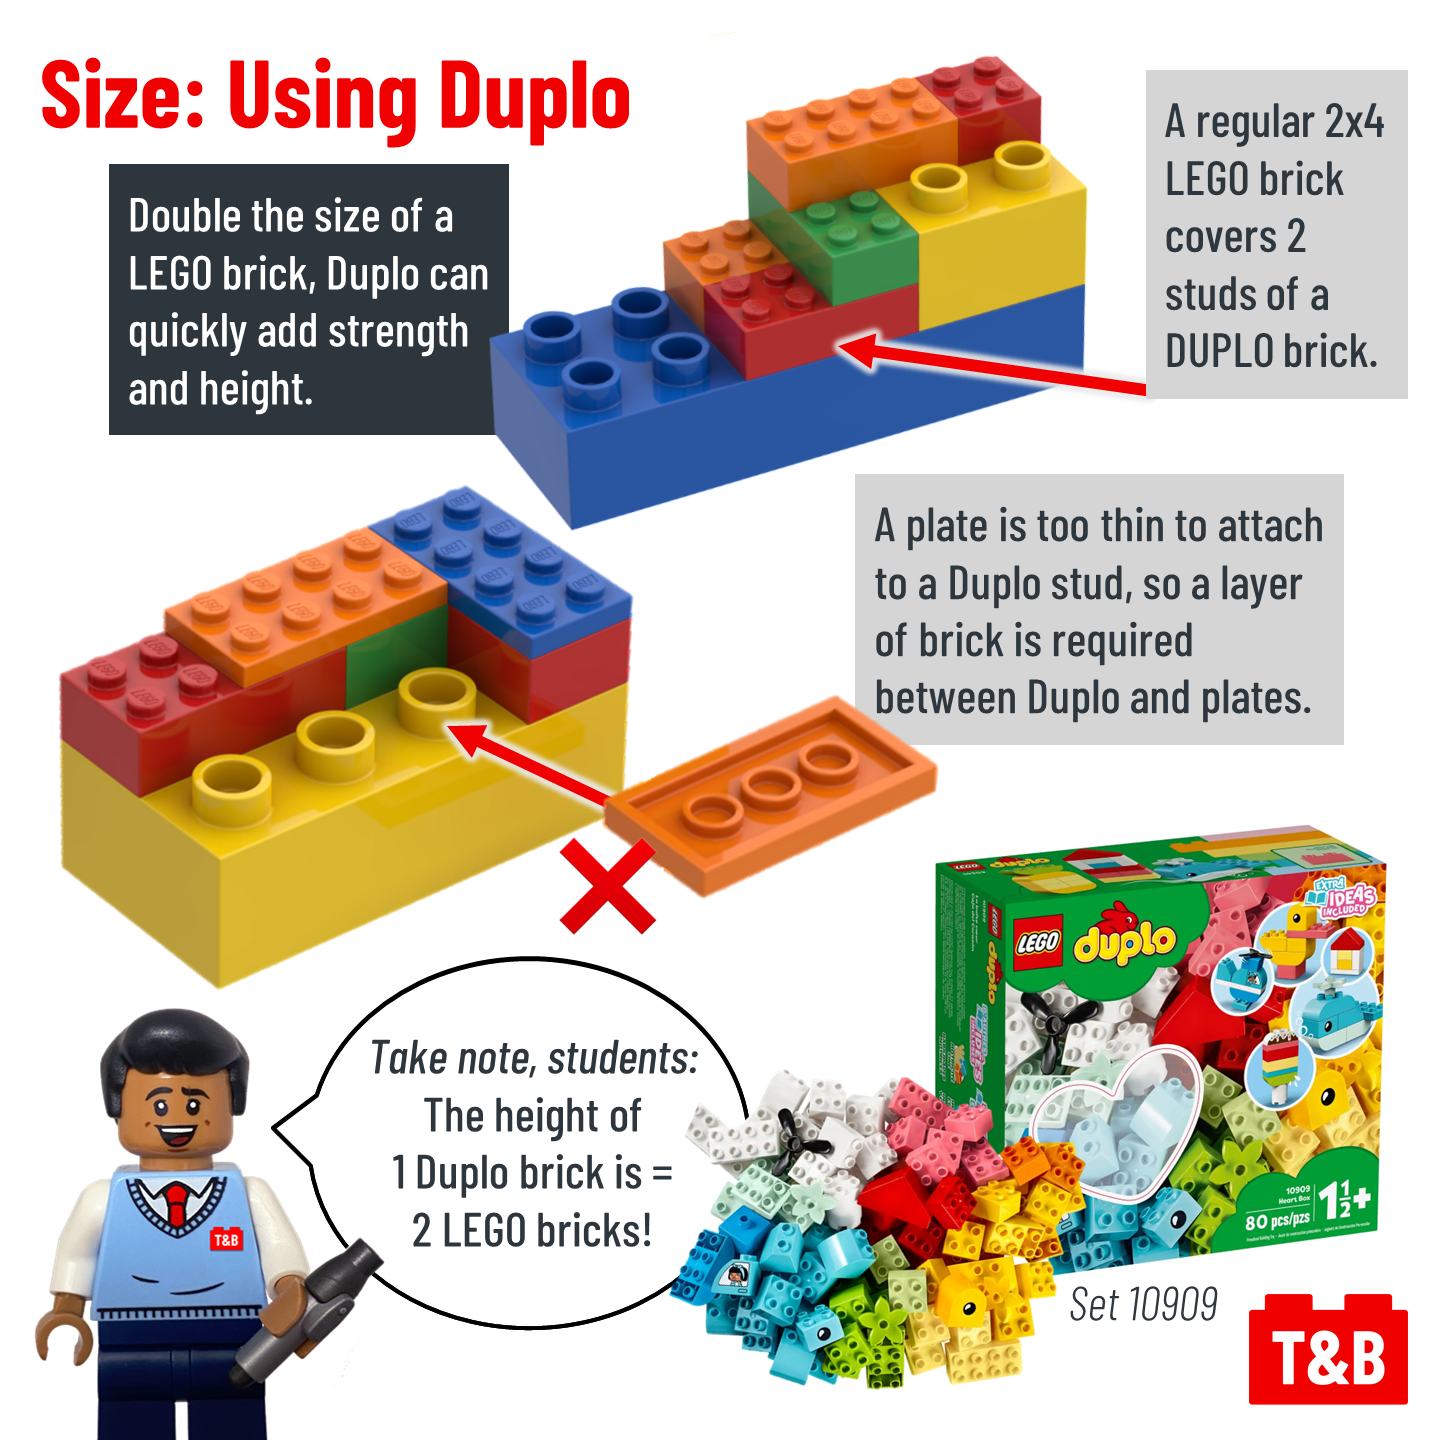
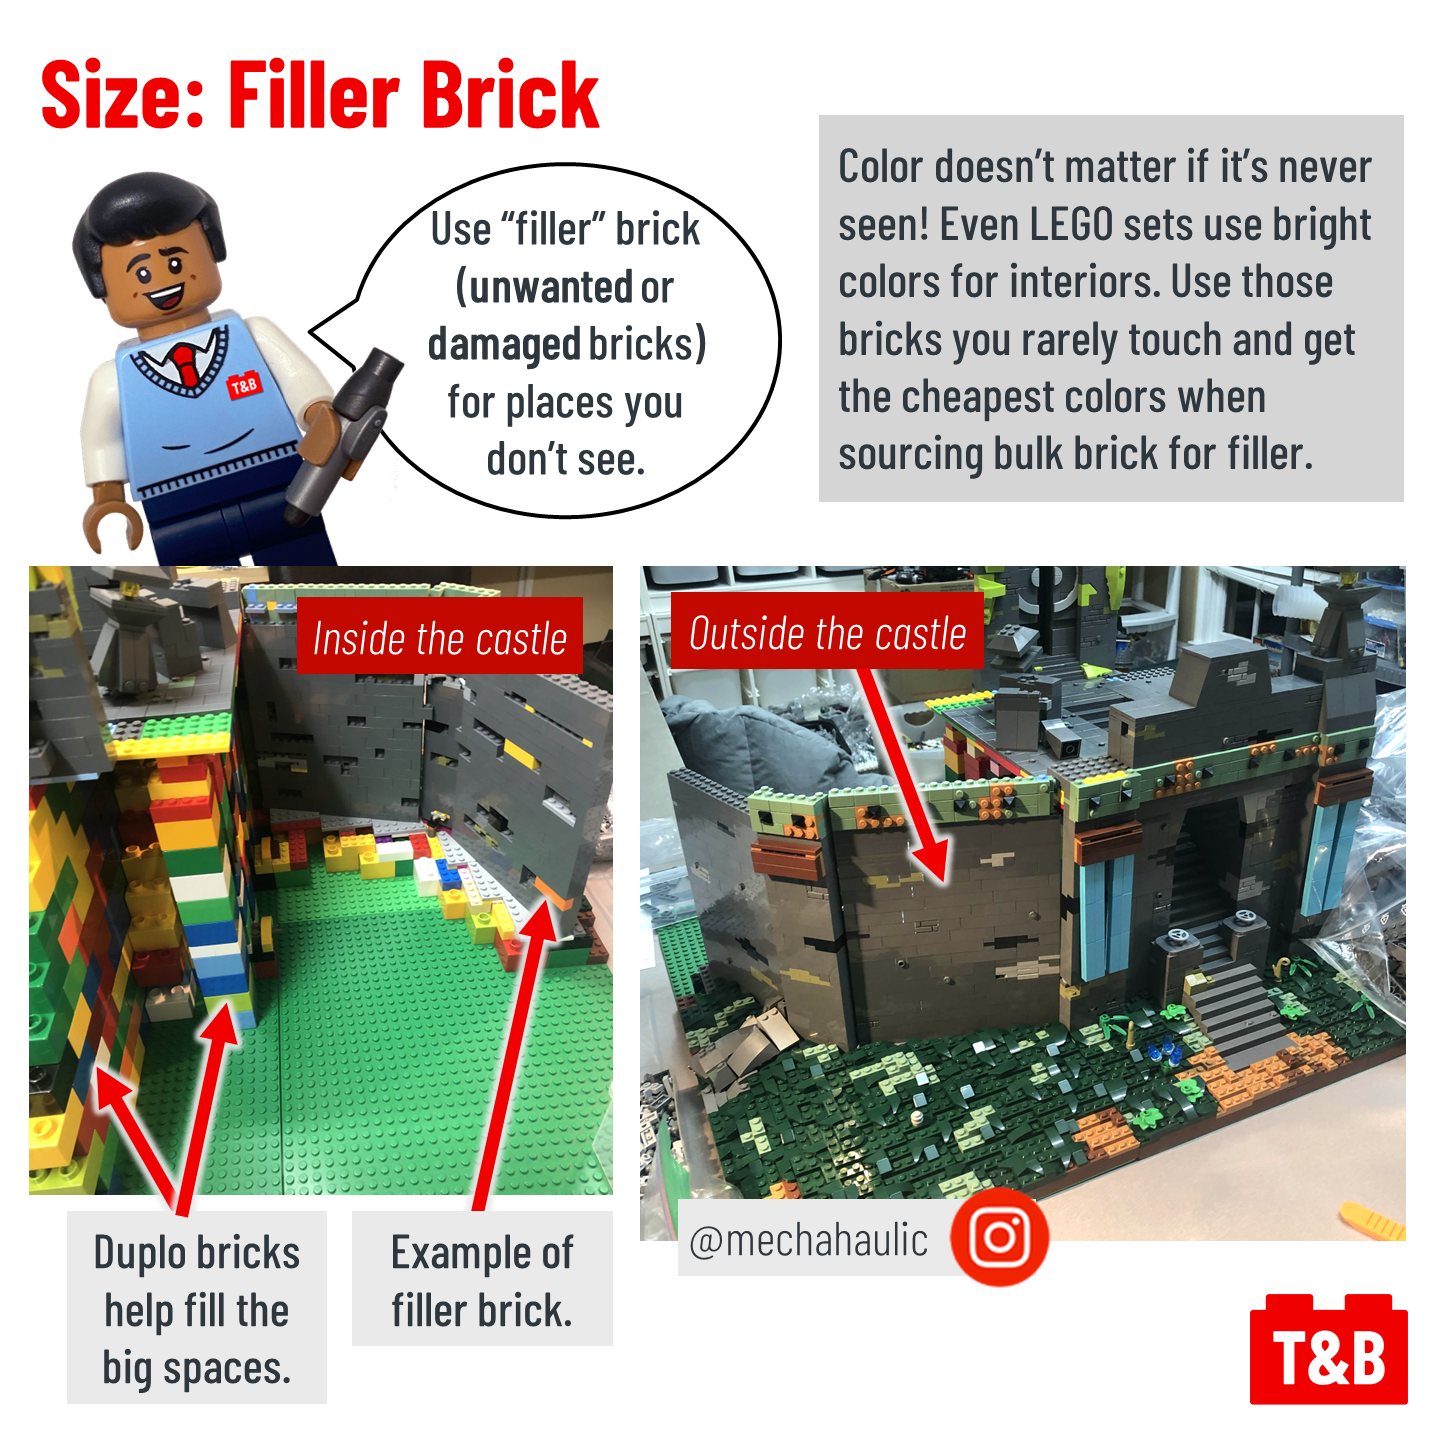
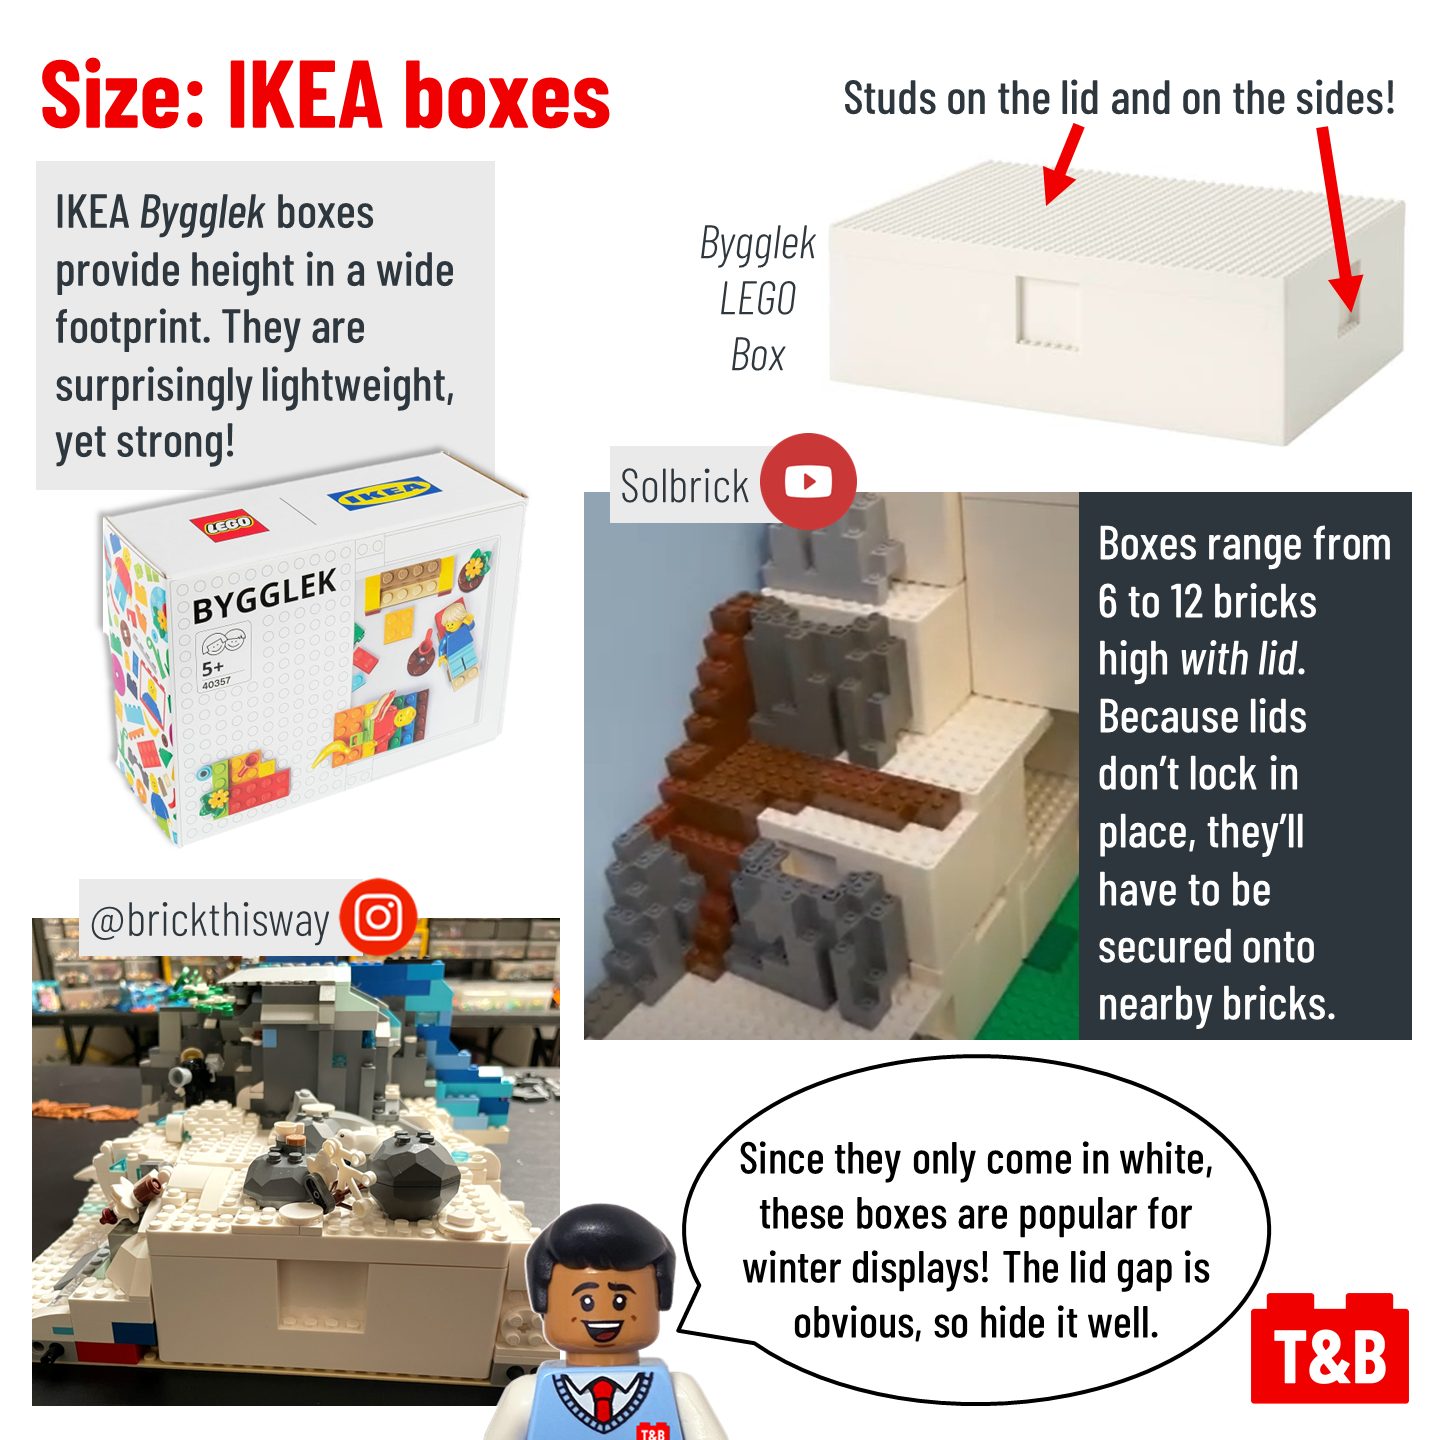
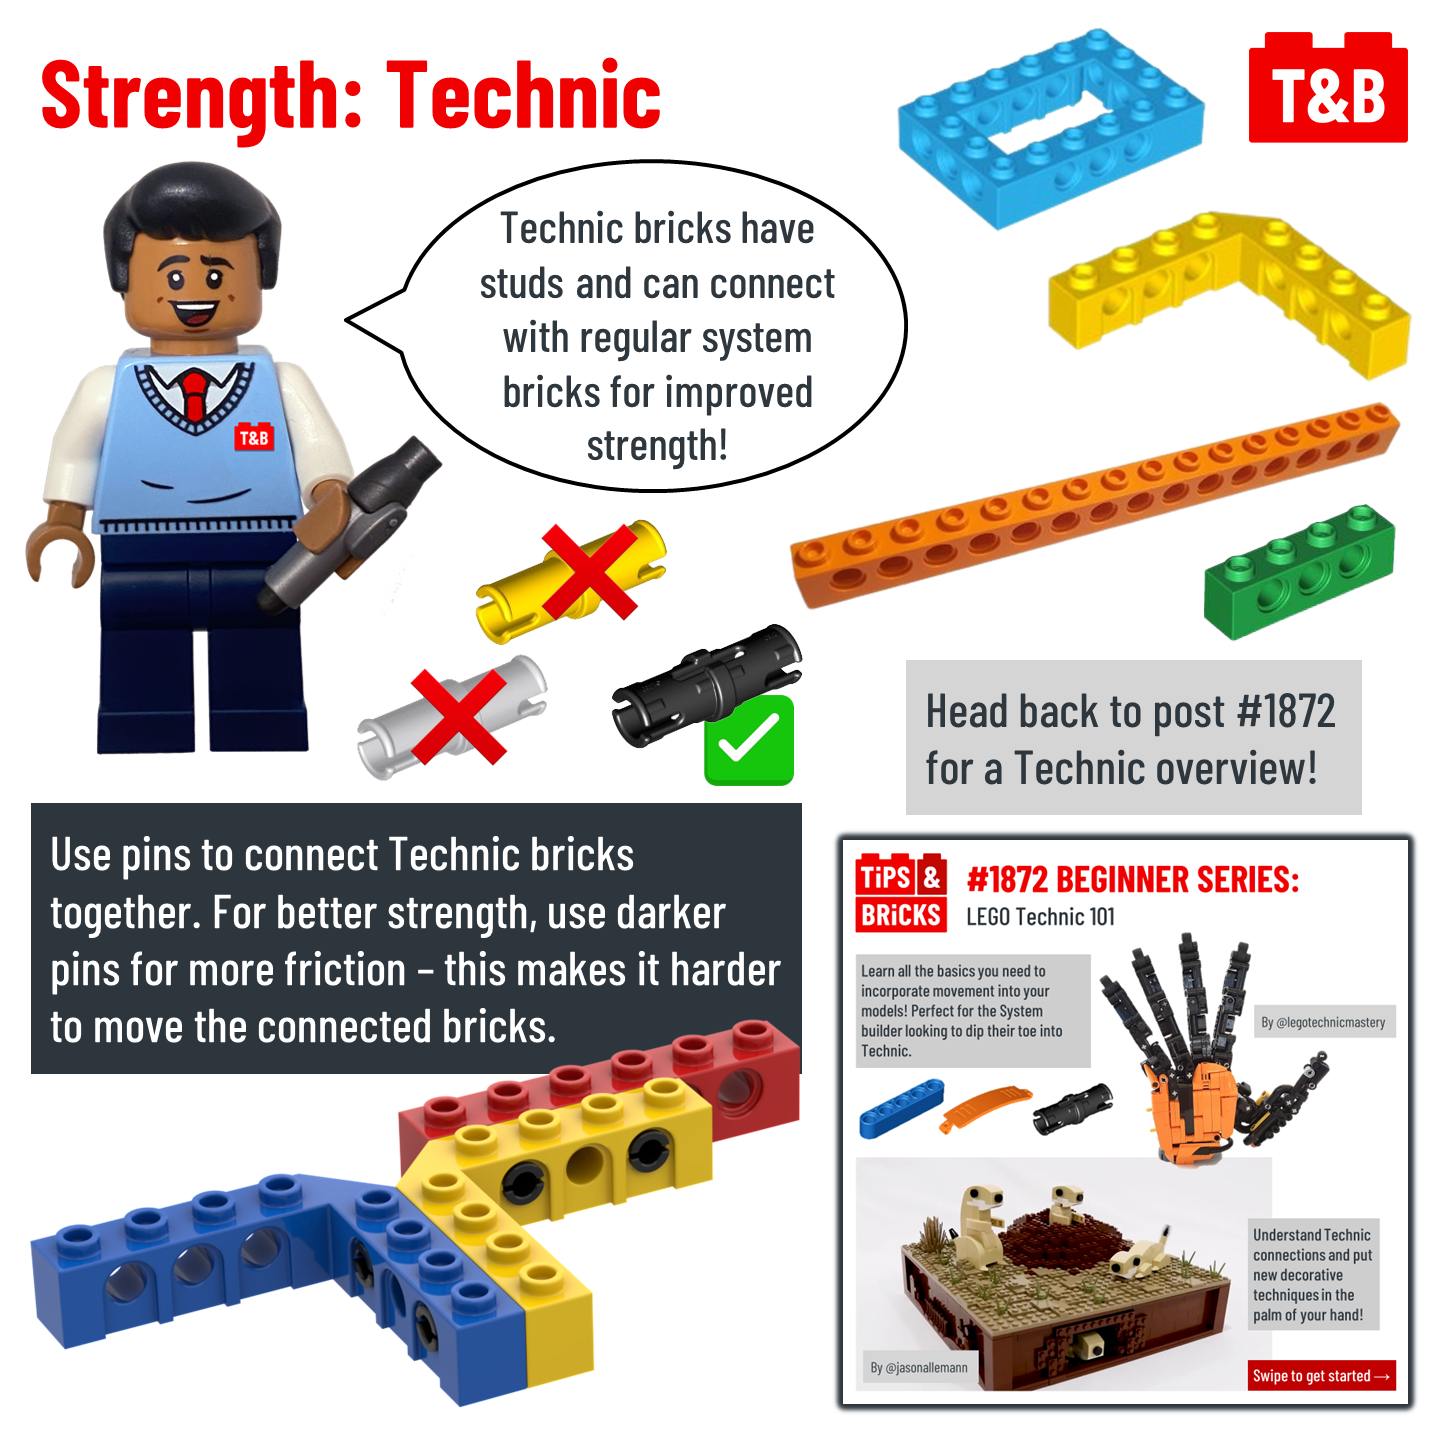
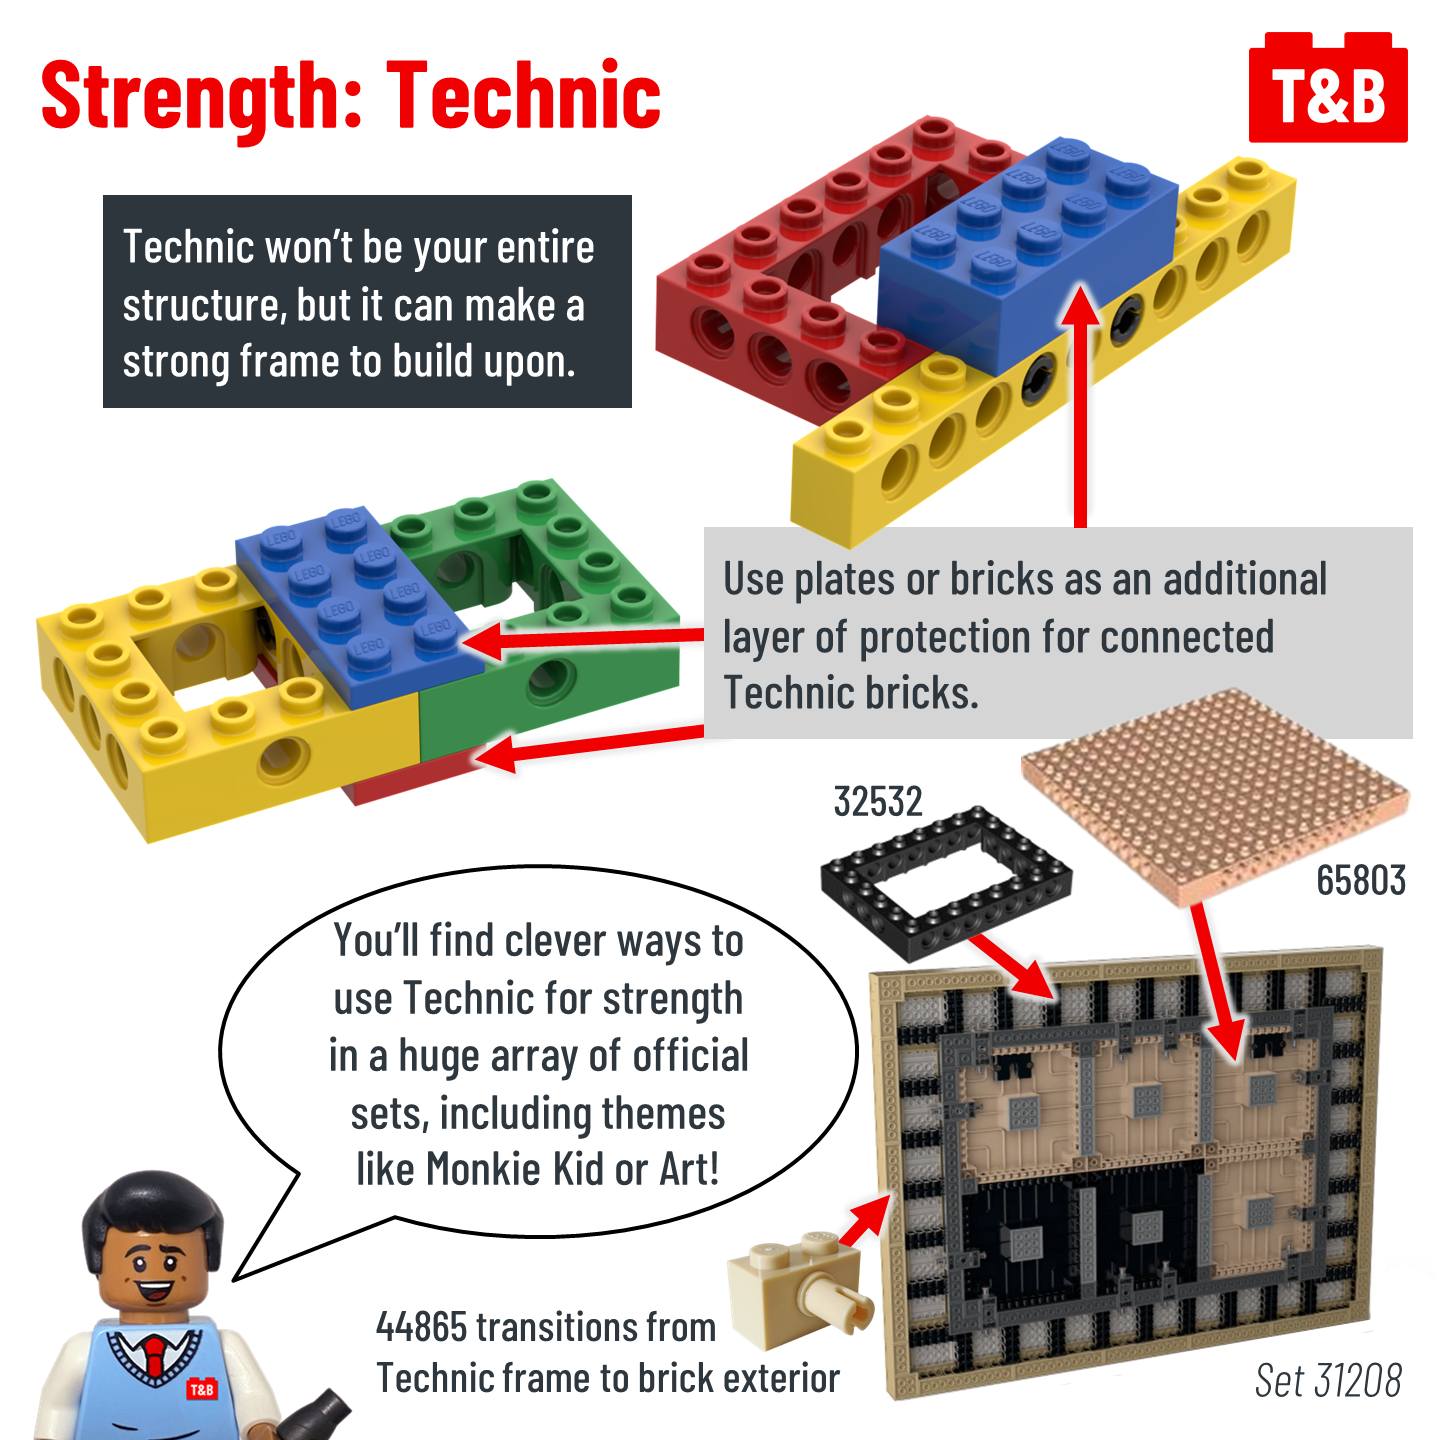
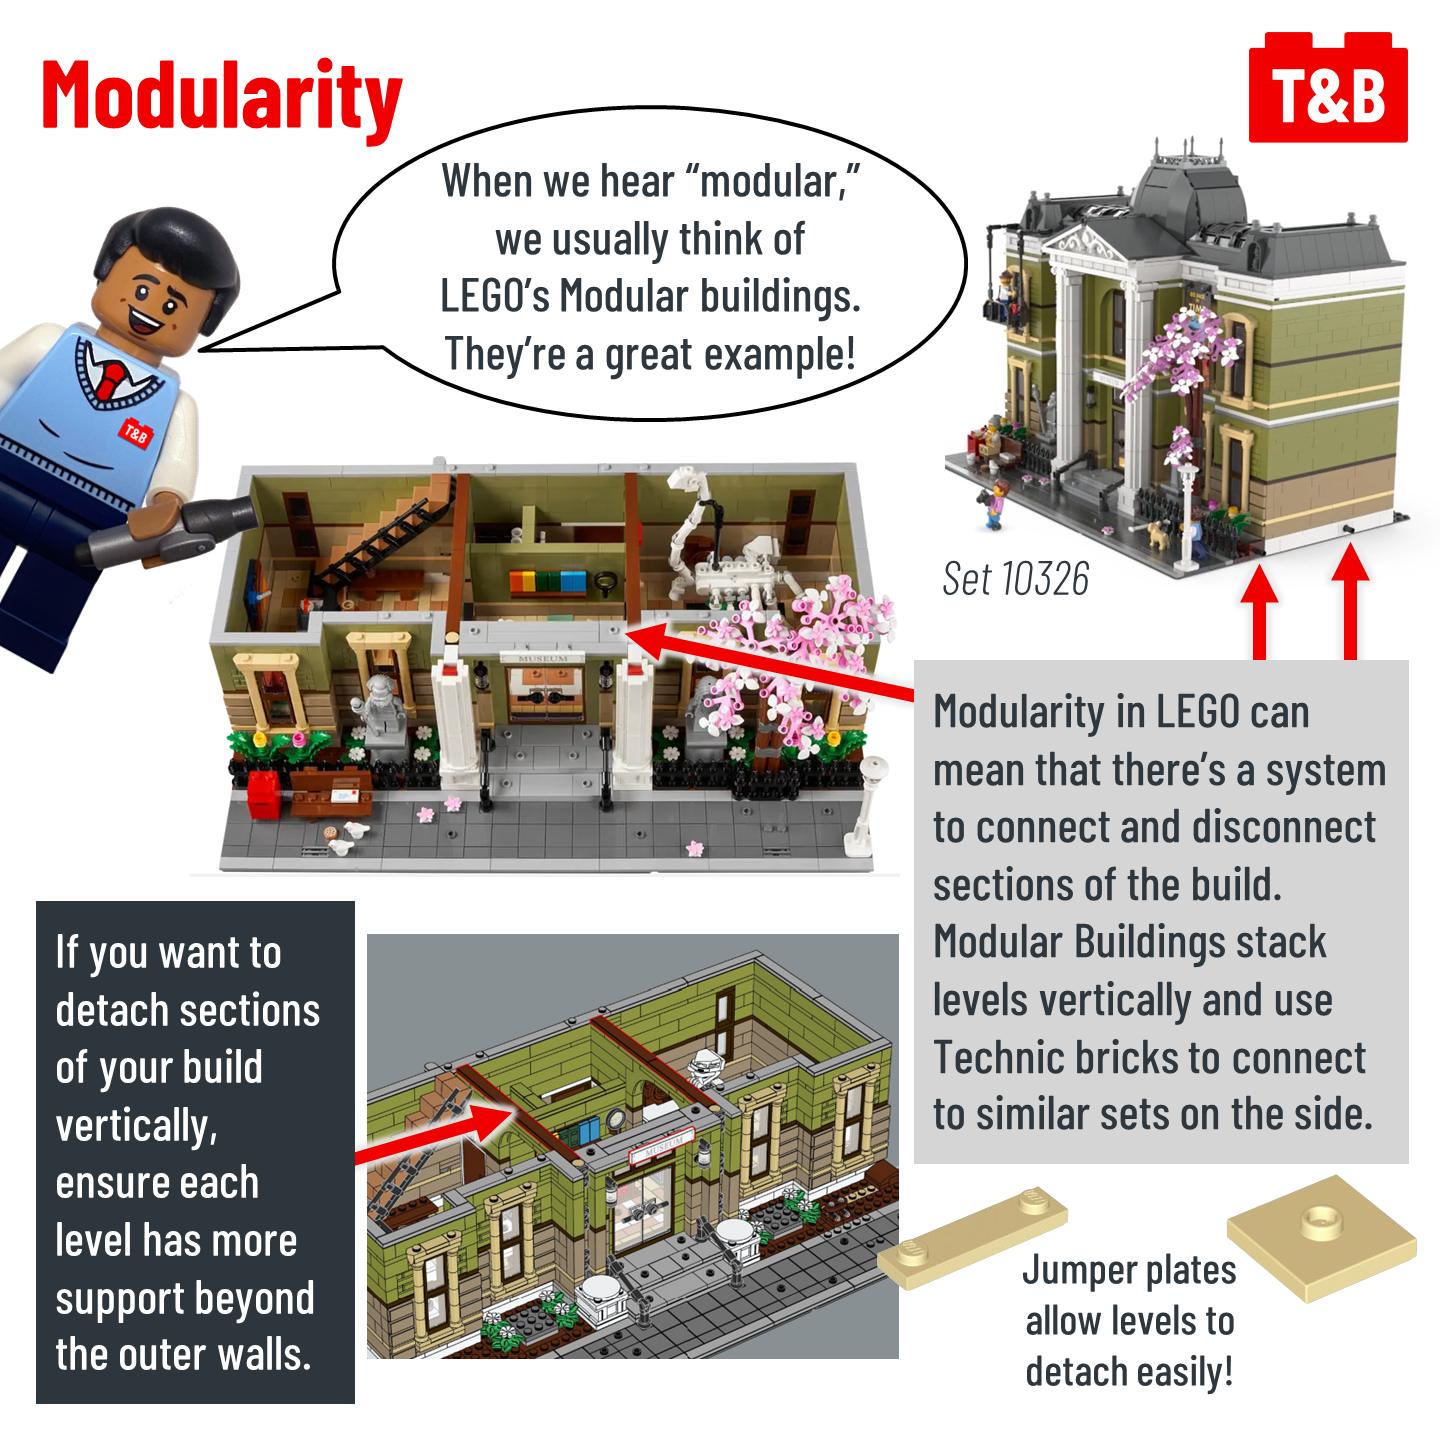
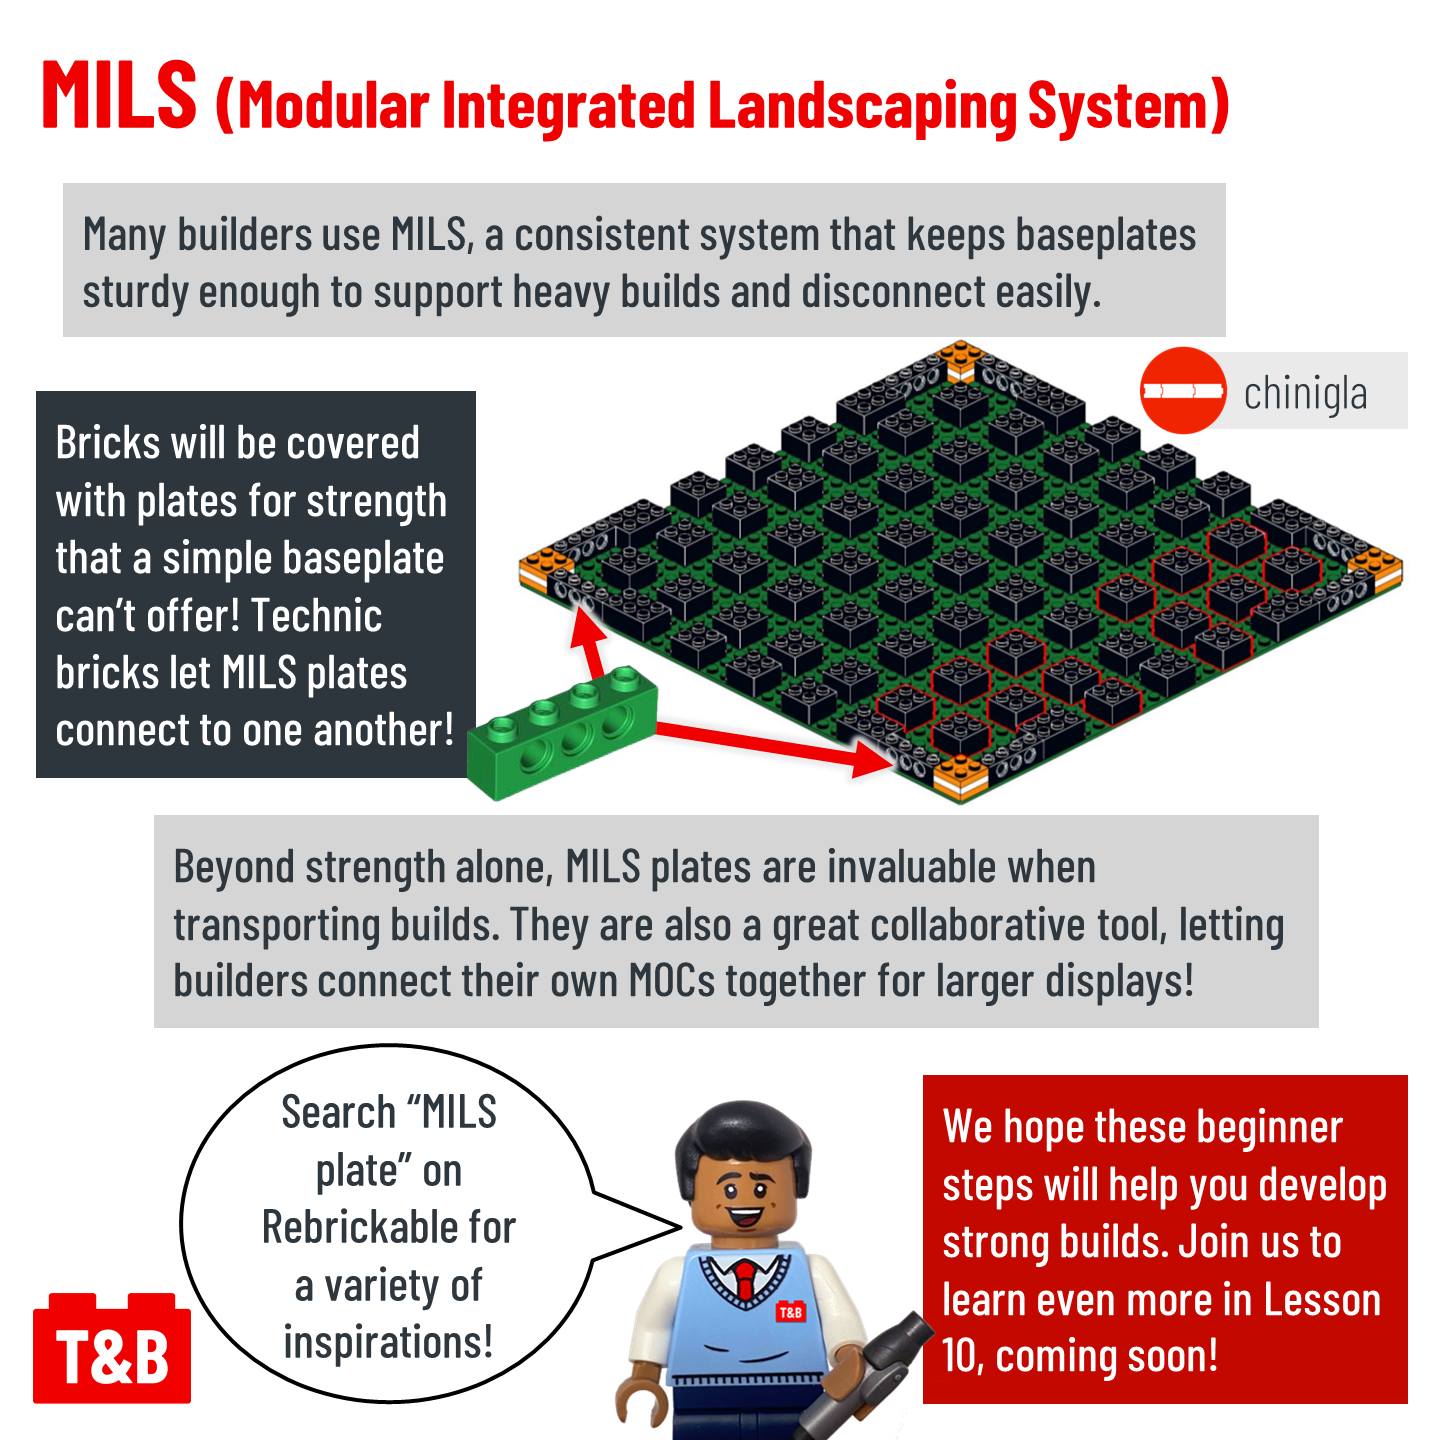
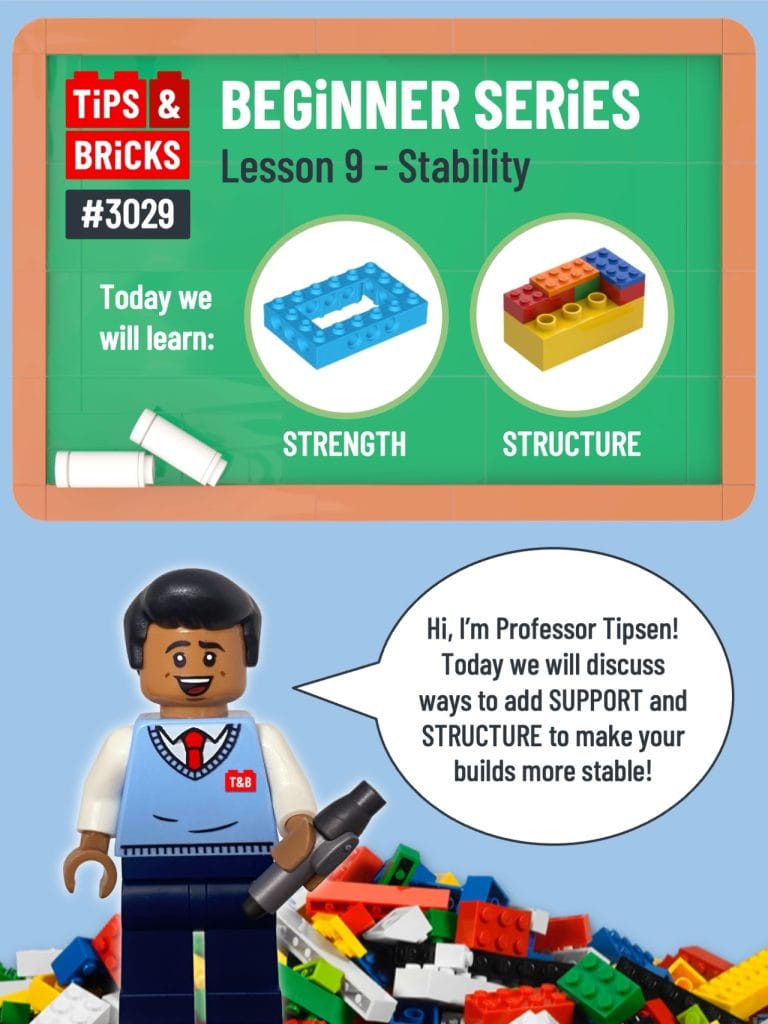
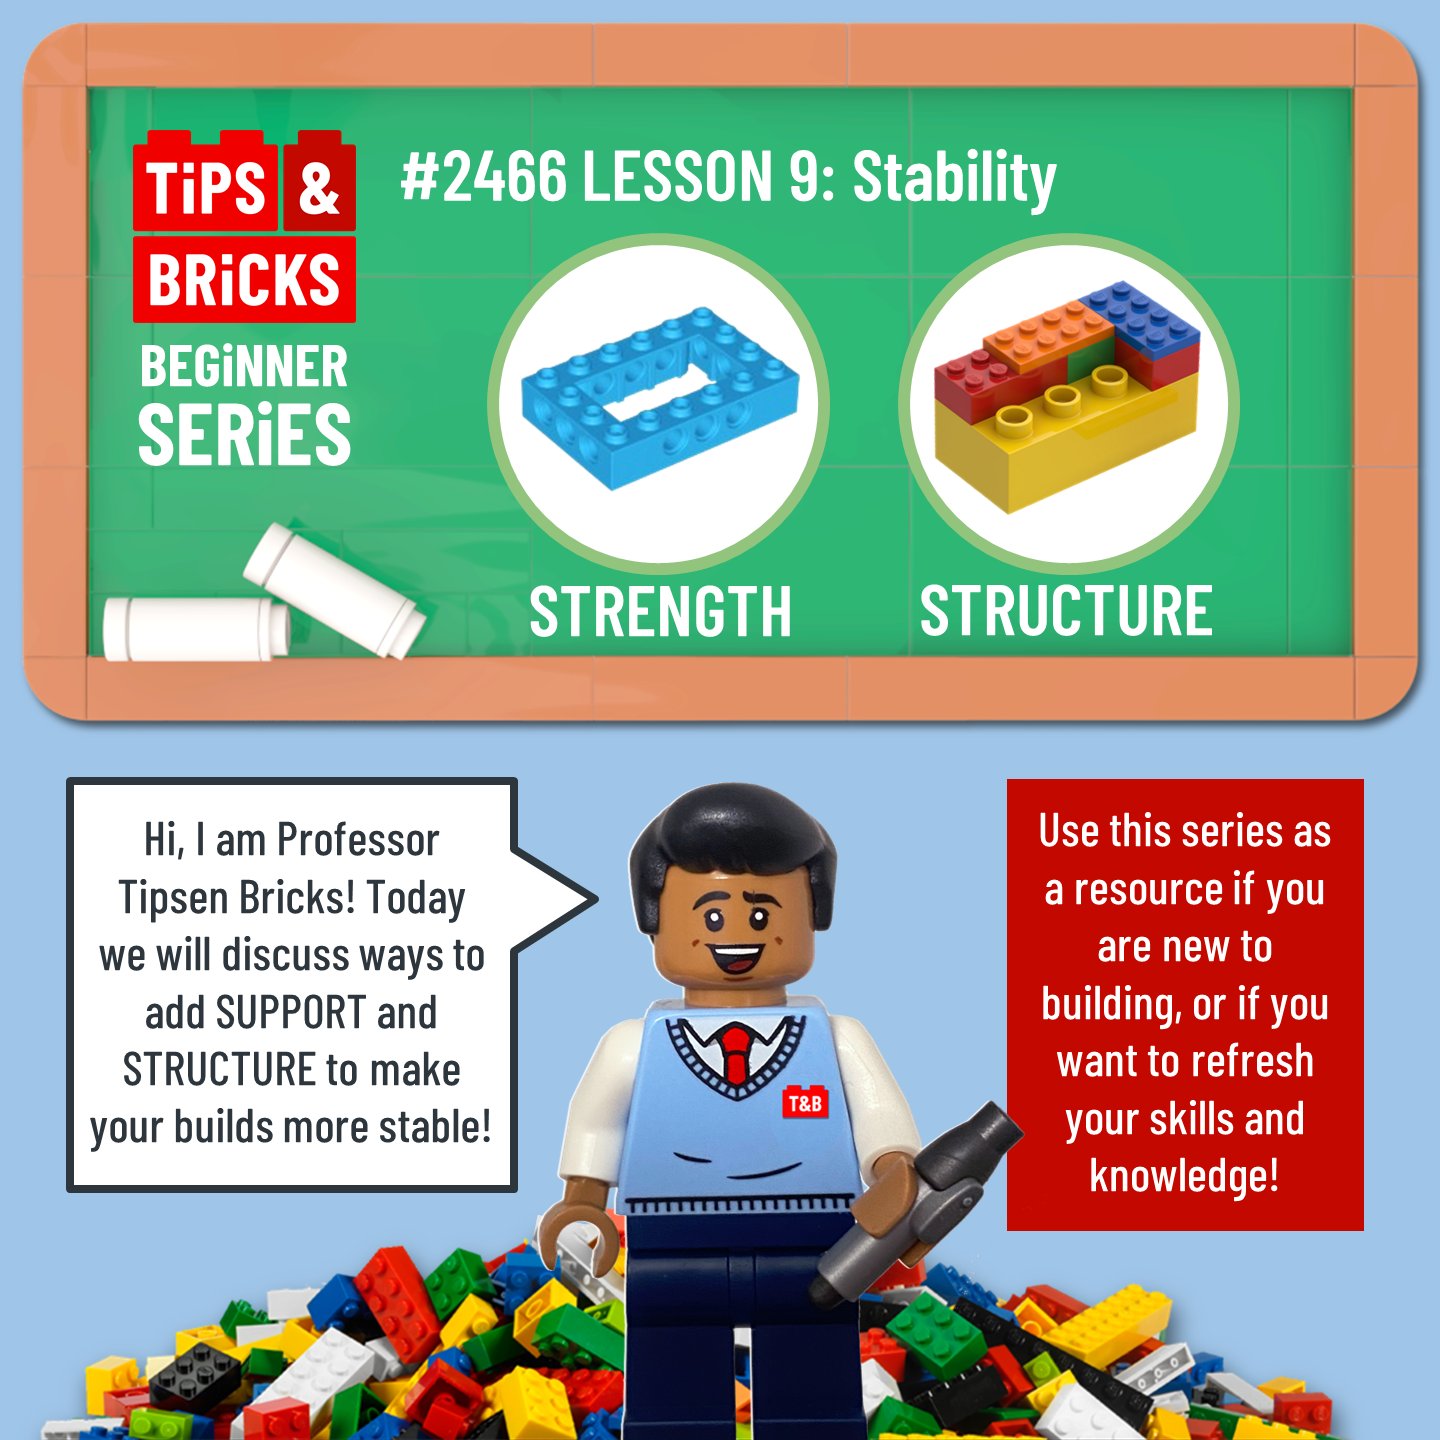
Professor Tipsen Bricks is back again to help impart some knowledge about way to help your large builds be more stable. You may be surprised by some of his suggestions! Be sure to check over previous lessons and share some of your own best tips with us in the comments too.


Thanks to @mechahaulic for providing images of a work-in-progress build!


Tips & Bricks BEGINNER SERIES: #2466 LESSON 9: Stability STRENGTH is written below an image of part 32531, Technic, Brick 4 by 6 Open Center. STRUCTURE is written below a 2 by 4 Duplo piece with some LEGO bricks and plates on top. “Hi, I am Professor Tipsen Bricks! Today we will discuss ways to add SUPPORT and STRUCTURE to make your builds more stable!” Tipsen is a minifigure wearing a light blue sweater vest and tie with a T&B logo. Use this series as a resource if you are new to building, or if you want to refresh your skills and knowledge!

Support Basics According to Tipsen, “LEGO builds can get heavy extremely quickly! Pay attention to your structure to avoid disaster!” When stacking traditional bricks, always aim for at least two studs of overlap! Renders show stacks of 2 by 4 bricks. One render show only 1 stud overlapping with a red X, while another render shows 2 studs overlapping with a green check mark. Alternate bricks and plates so they aren’t stacking directly on top of each other. Plates can also be used, but lots of plates will be heavier. A render shows eight rows of overlapping 2 by 4 plates. Alternating bricks is also useful when changing direction. Unless you want to detach entire walls, it is important to create overlap at corners. A render shows 2 by 4 bricks stacked to create two corners, with the overlap allowing the bricks to change direction.

Size: Using Duplo Tipsen says “Take note, students: The height of 1 Duplo brick is = 2 LEGO bricks!” Set 10909 is shown, which is a collection of Duplo bricks. Double the size of a LEGO brick, Duplo can quickly add strength and height. A regular 2x4 LEGO brick covers 2 studs of a DUPLO brick. Renders show a 2 by 6 Duplo brick with a 2 by 2 Duplo brick on top. 2 by 4 and 2 by 2 LEGO bricks stack on it to show height and length of Duplo against LEGO. A plate is too thin to attach to a Duplo stud, so a layer of brick is required between Duplo and plates. A render shows that a layer of LEGO bricks can allow plates to sit on top, but a red X indicates that an upside down plate with its shallow underside cannot sit on the large Duplo studs.

Size: Filler Brick Tipsen says to “Use “filler” brick (unwanted or damaged bricks) for places you don’t see.” Color doesn’t matter if it’s never seen! Even LEGO sets use bright colors for interiors. Use those bricks you rarely touch and get the cheapest colors when sourcing bulk brick for filler. Two images from builder @mechahaulic show the interior and exterior of the same large castle build. No random colors or Duplo are visible from the exterior, but inside the castle Duplo bricks help fill the big spaces. Example of filler brick are pointed out, where random colors are part of the interior of the castle wall.

Size: Wall Panels Part 59349 is six studs wide and five bricks high! @interactivebricks uses them across the front of her build. A large Winnie the Pooh MOC is shown, with panels across the front raising the build t o a variety of heights. Rock panels hide DUPLO bricks. Another MOC by @interactivebricks is a large Muppet Treasure Island build. The 2 by 4 by 6 rock panel, part 47847, is pointed out in the build. Tipsen says that “Panels aren’t as sturdy as interlocked bricks, but additional support can help!” A render is shown using panel 59349. A 1 by 8 brick is placed on top and underneath, with 1 by 2 by 6 bricks on either side of the panel. A second panel is placed on top of the upper 1 by 8 brick.

Size: IKEA boxes IKEA Bygglek boxes provide height in a wide footprint. They are surprisingly lightweight, yet strong! Box art of the Bygglek box is shown, along with an image of a large Bygglek box. Studs are on the lid and on the sides! Boxes range from 6 to 12 bricks high with lid. Because lids don’t lock in place, they’ll have to be secured onto nearby bricks. An image from a Solbrick on YouTube vidoe shows stacks of boxes, with rock panels and bricks used to cover some parts of the box and help secure them together. Tipsen says “Since they only come in white, these boxes are popular for winter displays! The lid gap is obvious, so hide it well.” An image from @brickthisway shows a small Bygglek box underneath snow and rocks to create a snowy slope.

Strength: Technic Tipsen says “Technic bricks have studs and can connect with regular system bricks for improved strength!” A variety of Technic bricks, including ones with open center, corners, 1 by 4, and 1 by 16, are all shown. Use pins to connect Technic bricks together. For better strength, use darker pins for more friction – this makes it harder to move the connected bricks. Yellow and light bluish gray pins are shown with red Xs over them, while a black Technic pin is shown with a green checkmark. A render shows two 32555 Technic, Brick 5 by 5 Right Angle bricks secured against each other with black pins. A 1 by 6 Technic brick is also connected to one of the right angle bricks. Head back to post #1872 for a Technic overview! A thumbnail of the post’s title slide is shown.

Strength: Technic Technic won’t be your entire structure, but it can make a strong frame to build upon. Use plates or bricks as an additional layer of protection for connected Technic bricks. Renders show part 32531, Technic, Brick 4 by 6 Open Center attached to a 1 by 10 Technic brick. A 1 by 4 LEGO brick is placed on top of the Technic bricks for an additional layer of support. Another render shows two of part 32324 Technic, Brick 4 by 4 Open Center attached with pins, with 1 by 4 LEGO plates on top and bottom to secure the parts together. Tipsen says that “You’ll find clever ways to use Technic for strength in a huge array of official sets, including themes like Monkie Kid or Art!” The back of set 31208, the Great Wave, is shown. Parts 65803 (Technic brick 1 by 16) and 32532 Technic, Brick 6 by 8 Open Center are pointed out. Part 44865, Brick, Modified 1 x 2 with Pin and Bottom Stud Holder, transitions from Technic frame to brick exterior.

Modularity Tipsen says “when we hear “modular,” we usually think of LEGO’s Modular buildings. They’re a great example!” Images of Set 10326, the Modular Museum, are shown. Modularity in LEGO can mean that there’s a system to connect and disconnect sections of the build. Modular Buildings stack levels vertically and use Technic bricks to connect to similar sets on the side. Arrows point out these points of attachment on the Modular Museum. Jumper plates allow levels to detach easily! If you want to detach sections of your build vertically, ensure each level has more support beyond the outer walls. The interior of the Museum’s first level is shown, with long brick structures running perpendicular to the museum’s front and back. These are supports for the upper levels.

MILS (Modular Integrated Landscaping System) Many builders use MILS, a consistent system that keeps baseplates sturdy enough to support heavy builds and disconnect easily. A 32 by 32 baseplate with many 2 by 2 bricks spaced out is shown - this is a simple MILS base by chinigla on Rebrickable. Bricks will be covered with plates for strength that a simple baseplate can’t offer! Technic bricks let MILS plates connect to one another! 1 by 4 Technic bricks are pointed out on the sides of the MILS structure. Beyond strength alone, MILS plates are invaluable when transporting builds. They are also a great collaborative tool, letting builders connect their own MOCs together for larger displays! Tipsen suggests builders “Search “MILS plate” on Rebrickable for a variety of inspirations!” We hope these beginner steps will help you develop strong builds. Join us to learn even more in Lesson 10, coming soon!


Comments


bottom of page